Ever tried trimming your cat’s nails and ended up with scratches on your arms and your cat safely tucked away under the bed? Yeah, me too. Trust me, you’re not alone.
Knowing how to trim your cat’s nails safely is easier said than done, especially if your cat isn’t overly fond of it. I’ve attempted it with my fair share of bad experiences until I learned what worked.
There’s no need to scare your cat or get hurt in the process. Read on and I’ll teach you everything you need to know about trimming your cat’s nails safely so both you and your cat can have a stress-free experience.

Why Trim Your Cat’s Nails Anyway?
I know. You have a cat that just seems fine without trimmed nails, or you’re tired of fighting with your cat every time you pick up those clippers. Still, trimming your cat’s nails is important.
Long nails can become curved and break or tear the sensitive tissue in your cat’s paw pad. Long nails can easily get caught on fabric, furniture, and carpet as well, which may cause pain or injury to your cat if they get snagged and pull hard to get them loose.
If you trim your cat’s nails regularly, however, you won’t have to worry about these things. Your furniture will thank you. Your skin will thank you. And best of all, your cat will thank you by being comfortable and moving freely without any obstructions.
Trimming becomes routine after a while. Just another task in caring for your cat, like feeding or brushing them.
Gather Your Supplies
Before you pick up your cat, gather your supplies and have them within reach. I cannot stress this enough: do NOT start picking up your cat’s paws, only to then realize you don’t have your clippers. Chances are you’ll lose your cat’s patience and have defeated the purpose before you even begin.
Here’s what you’ll need:
● Nail Clippers: Buy a pair of cat nail clippers. You can get either guillotine or scissor style clippers. They both do the job just fine, so get whichever feels the most comfortable in your hand. I like to use scissor-style clippers because I have more control that way.
● Styptic Powder or Cornstarch: Accidents happen! Especially at first. You want to be prepared in case you nick the quick (more on that later). If you have styptic powder close by, you’ll feel more confident about trimming. Don’t have styptic powder? No problem! Cornstarch works just as well.
● Treats: This is perhaps the most important part. If your cat does anything you want them to repeat, give them a treat. Positive reinforcement will go a long way.
● Light: You need to be able to see those tiny kitty nails.
Get Your Cat Used to Having Their Paws Touched
Many people new to trimming dive right into it. Don’t be that person.
Several days before you plan to trim your cat’s nails, start handling their paws casually. Pick up a paw, gently squeeze the toe to extend the nail, then release. Reward with a treat. Repeat with each paw several times per day until your cat is indifferent to you touching their paws. Do this when your cat is already relaxed, like while they’re sleepy or sitting in your lap.
Your cat may stiffen or try to move away from you if you do this too quickly. That’s okay! Just give the treat and try again later. You want to teach them that having their paws handled is nothing to be afraid of.
Once your cat is calm about you touching their paws, bring out the clippers. Let them sniff the clippers. Click the clippers near your cat a few times so they know what sound the clippers will make. Treat, treat, treat.
Trimming Steps
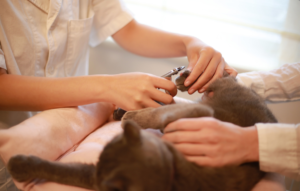
Alright, nail trimming time! Grab your cat and pick a spot with good lighting. I like to trim my cat’s nails while she’s on my lap on the couch, but you can also do this at a table if you have a towel or non-slip material to prevent your cat from sliding.
STEP 1: Position Your Cat
If your cat hates getting their nails clipped and tends to squirm, I suggest wrapping them in a towel first. Make it into a “purrito” and clip away. If they don’t seem bothered by you holding them, you can skip this step.
Hold your cat in your lap or wrap them in a towel, leaving just one paw exposed.
STEP 2: Extend the Nail
Grab one paw in your free hand and gently squeeze the toe pad using your thumb and pointer finger. Your cat’s nail will extend out for you to see.
Do not squeeze hard — you don’t want to hurt your cat. Just firm enough that the nail is extended.
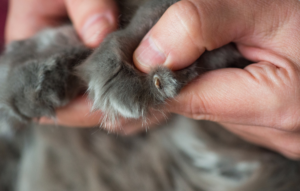
STEP 3: Locate the Quick
Look at your cat’s nail and you will notice a pink area inside the nail. This is called the quick. The quick contains blood vessels and nerves. Cutting into the quick will cause bleeding and hurt your cat, so always avoid cutting this part.
You will only be trimming the clear, curved tip of the nail. As your cat’s nails grow darker, the quick will be harder to see. If you can’t easily see the quick, trim smaller amounts so you don’t accidentally hit it.
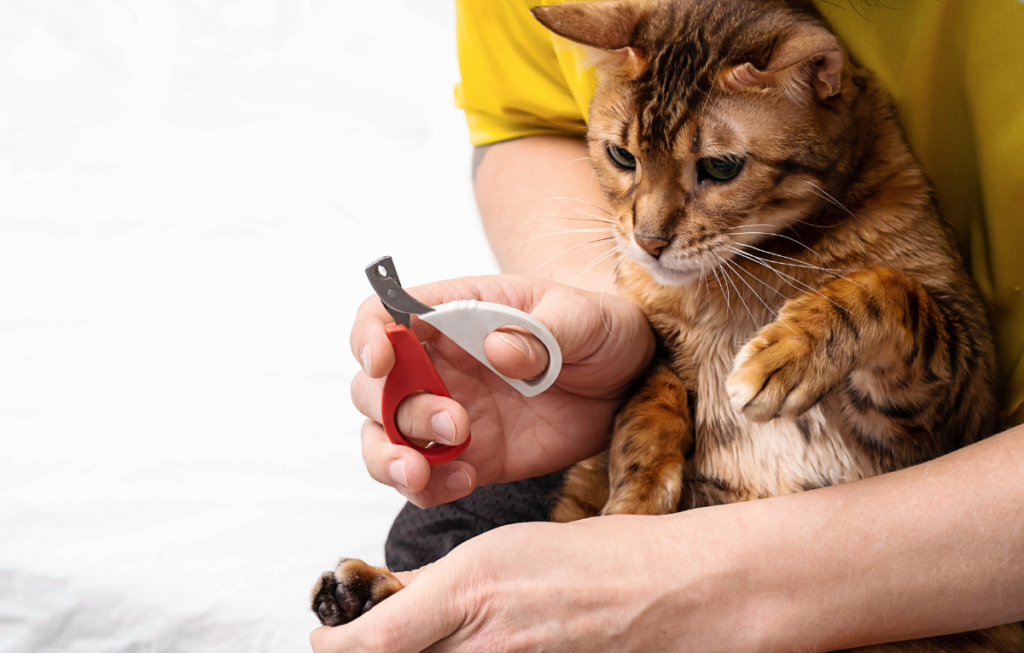
STEP 4: Time to Clip!
Place your clippers near the tip of the nail, making sure to cut straight across and not at an angle. You want to trim several millimeters away from the quick.
Don’t jerk or squeeze the clippers shut. Use one fluid motion when clipping.
STEP 5: Take a Break if Needed
A lot of people think you have to trim all of your cat’s nails in one sitting. That’s not true. You can trim just a few nails per day until you get the job done. If your cat starts pulling away, batting at your hands, or behaving aggressively, take a break.
Some cats may only need to have their nails trimmed every three to four weeks. However, others may need more frequent trimming. How often you trim your cat’s nails will depend on your individual cat.
You’ll get to know your cat and learn how fast their nails grow. A good way to tell if it’s time to trim? You’ll be able to hear their nails clicking against the hard floor as they walk.
Front claws will usually grow faster than back claws. Some cats may even have shorter nails on their back paws due to not using them as much. Depending on your cat, you may find that you never need to trim their back nails because daily activities wear them down enough.
Wrapping Up
After you finish trimming, give your cat plenty of love and attention. Praise them and tell them what a good kitty they are for letting you trim their nails. Over time, your cat will look forward to when you bring out the nail clippers because they know they’ll get tasty rewards!
Learning how to trim your cat’s nails safely isn’t just about where to cut. It’s about teaching your cat that you will not hurt them when holding their paws. It’s about having your cat trust you.
Save pin for later

Special Cases: Cats Who Really Hate Nail Trimming
Sometimes you’ll encounter a cat that hates getting their nails done. Here are some tips that might help:
● Trim your cat’s nails after they eat or right after they wake up from a nap. Your cat will be more relaxed during these times.
● Try using a pheromone spray like Feliway on your countertop or the surface where you’ll be trimming your cat. It can help ease their anxiety.
● If possible, recruit another person to help you trim your cat’s nails. One person can focus on comforting the cat while the other does the trimming.
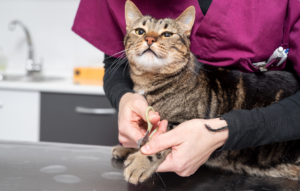
If your cat seems extremely stressed every time you attempt to trim them despite your best efforts, consult your veterinarian. They can trim the nails for you at the next checkup, and many vets offer tips tailored to your individual cat.

- Best Dog Crate Picks for Dog Owners - March 13, 2026
- Top 10 Insane Facts About The Cane Corso - March 13, 2026
- Pet Insurance For Dogs Explained! - March 13, 2026