When you own a dog, you quickly realize they can get into everything. One minute they’re sleeping on the couch and the next they’re halfway up the stairs exploring who-knows-what. Or trying to squeeze into rooms they probably shouldn’t be in. That’s why I built a DIY dog gate for stairs and doorways in my home and never looked back. It was one of the best decisions I’ve made as a dog owner. Before I got tired of climbing stairs to tend to Whiskey every time she needed to go out, that is.
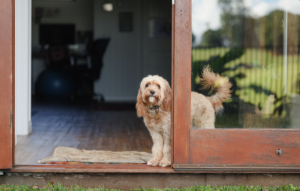
I built my own DIY dog gate because they’re expensive when you buy them from the store. They come in limited sizes, and they almost always look like this:
[dog gates]
…but mine can match my décor! Another downside of pre-made dog gates is they don’t always hold up to abuse. Especially if you have a rambunctious dog like mine. Mine would shimmy under the cheap ones we tried. Or she would lean hard against the gate until it tipped over. Needing a new dog gate every few years is frustrating AND expensive. So I did some research and learned how to build my own. It was cheaper than buying one, and I was able to customize the size and color to fit my home. Let me show you how to build your own dog gate too!
Why Build a Dog Gate Yourself?
Homemade dog gates don’t come with many downsides. Unless you don’t have the tools or know-how to build one. But there are plenty of free DIY dog gate plans like this one that make building one easy, even if you don’t consider yourself “handy.” Here’s what you lose (and gain) when you decide to build your own dog gate instead of buying one.
Store-bought dog gates always come in weird sizes. You know how most bathrooms come in “standard” sizes? Well, dog gates are the same way. You’re stuck buying kits to make them go a few inches longer or shorter. Or you end up with one that sticks out too far into the room because there isn’t a size to properly fit your doorway.
They only come in white. Or beige. Or brown. Unless you want your home to match your dog gate, pick the finish that works best for you!
Some of the cheaper models fold or tip over at the first sign of pressure. Sure, dogs will test their new boundaries. But your DIY dog gate won’t wobble or bend when they do. Especially if you use the tips I outline below.
You can choose the height, width, and color. You can literally customize every element of this dog gate to work with your home. Yours won’t look like every other dog gate out there.
You know it’s built to last. Especially if you use my tips to help ensure your hard work doesn’t bend or break.
What You’ll Need for Your Dog Gate
Materials:
- 1×4 pine boards (actual amount will vary depending on the width and height you choose)
- 1×2 pine boards (these are used for the frame and cross supports)
- Wood screws (I used 1.5 inch and 2.5 inch screws)
- Wood glue
- Sandpaper (medium grit and fine grit)
- Wood stain or paint
- Heavy-duty hinges (you’ll need 2-3 depending on how tall your gate is)
- Gate latch or barrel bolt
- Wall anchors or mounting board (for drywall installations)
Tools:
- Tape measure
- Pencil
- Circular saw or miter saw
- Drill
- Drill bits
- Clamps
- Level
- Safety glasses
That’s it! Basic tools and materials most people already have around the house. The only exception is the saw. Most hardware stores will cut your wood for you at no charge if you don’t have one.
Step 1 — Measure Your Opening
Measure, measure, measure. Buy twice, cut once, as they say. Measure the width of your doorway or staircase opening at least twice. Write it down. Measure the height you’d like your gate to be. I made mine 30 inches tall, but 24 to 30 inches is really enough to contain most dogs.
Keep in mind that if your doorway has baseboards or trim, you’ll need to accommodate for that when placing your gate. You’ll want your gate to fit flush against the wall once it’s closed.
Step 2 — Cut Your Wood
For your vertical slats, I used 1×4 boards cut to 30 inches. Space them about 2.5 to 3 inches apart. Any closer and your dog can squeeze through; any farther and it just looks weird.
Cut two boards from your 1×2 stock. These will serve as your frame at the top and bottom of your gate. Cut them to however wide you need to cover your opening.
Then, it’s time to sand all your boards. Take your medium-grit sandpaper and go over the entire surface of each board. This will help remove any splinters. Then, using your fine-grit sandpaper, go over the boards again. You want to sand them down nice and smooth before finishing. This will help your stain or paint adhere evenly.
Step 3 — Assemble the Gate
Set your two horizontal frame pieces flat on the ground, parallel to one another. Space them however tall you want your gate to be.
Stand your vertical slats up and evenly space them between the horizontal frame pieces. Use a tape measure to help ensure you have even spacing. You can try to do this by eye, but trust me when I say it won’t end well.
Apply a small bead of wood glue to each joint, then secure the frame and uprights together with screws driven through the horizontal pieces into the verticals. Use at least two screws per joint for strength. Let dry.
Optionally, apply a wood brace across the back of the gate for additional stability. This isn’t necessary, but I like the extra strength. Measure diagonally from one corner to the other and cut a 1×2 board to size. Secure it in place with wood glue and screws.
Step 4 — Finish the Wood
Now it’s time to make your DIY dog gate look pretty. First things first, put on your safety glasses. Then apply your wood stain or paint of choice to the gate. Depending on your color choice, you may need to apply multiple coats. Let it dry fully between coats.
After your final coat is dry, take your fine-grit sandpaper and very lightly sand the entire surface. This will remove any raised grain left by the stain. Apply one more coat.
Step 5 — Install the Hinges and Latch
Position your gate in the doorway where it will live. Then mark with a pencil where your hinges will go on both the gate itself and the door frame or wall it will mount to. For a gate that’s about 28 inches tall, I attached three hinges spaced evenly from top to bottom.
Use wall anchors that can support at least double the weight of your gate if you’re mounting directly to drywall with no stud behind it. If your house is like mine and you can only find 7 lb anchors at Home Depot, attach a 1×4 mounting board vertically to the wall. Screw that into a stud, then attach your hinges to that.
Once the hinges are installed, hang your gate and ensure it swings freely. Install your latch on the opposite side. A barrel bolt works great for this and can be operated with one hand — very handy if you often have a leash in the other hand.
Tips to Ensure Your Dog Gate Will Last
Use exterior screws
This is one of those things most people don’t think about. But even if your gate is purely for indoor use, your screws should be rated for outdoor use. Exterior screws are more rust-resistant, which helps them last longer. Especially in humid climates or if your gate is near your front door.
Add rubber feet to the bottom
Grab some rubber feet from your local hardware store. Attach them to the bottom corners of your gate. They keep it from scratching your floors and help quiet the gate when your dog bangs on it.
Check your hardware often
Things can get loose over time from your dog nudging, leaning, or clawing at the gate. Checking the screws every few months will prolong the life of your gate and make sure your dog can’t eventually worm their way through.

Seal the wood if needed
Got a drooly dog? You may want to finish your gate with a polyurethane topcoat. It will seal the wood and make cleanup easy if your dog decides they want to chew on the gate too.
FAQ
Can I build this without power tools?
Yes! A hand saw can cut through pine board. And if you don’t have a drill, a screwdriver works in a pinch.
How do I build a gate for a wide opening?
Measure the width of your largest opening, then build two gate panels to fit snugly against each other in the center. You can either purchase a wider gate latch or use two individual barrel bolts. Each gate panel will need to be attached to the wall on its own side, just as it would if there were no middle panel.
What is the best wood for a dog gate?
Pine is my go-to for almost any woodworking project because it’s cheap and easy to work with. For something that will get more abuse, try oak or poplar. Both are harder woods that can stand up to wear and tear better.
Will it hold a large dog?
If it’s built properly, yes. The weak point of most DIY dog gates is not the gate itself, but how it’s mounted to the wall. Take your time mounting it to something secure and it can hold a linebacker.
Can I add a pet door to the gate?
Of course! Most pet door kits come with instructions that say to cut an opening in your door before assembly. One less hole to cut!
Conclusion
Making your own dog gate is easy and inexpensive, and it can even be a fun project to tackle if you have some extra time on the weekend. This DIY dog gate for stairs and doorways has kept my dog out of trouble more times than I can count. And every time I look at it, I’m reminded that I built it with my own two hands. What could be better than that?
Save pin for later

- How to Build a DIY Dog Gate for Stairs and Doorways - April 8, 2026
- 8 DIY Dog Treat Recipes Your Furry Bestie Will Beg For - April 8, 2026
- How to Create the Ultimate Outdoor Dog Run in Your Backyard - April 8, 2026