
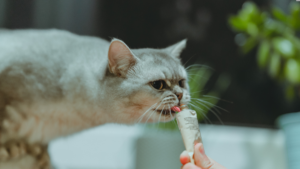
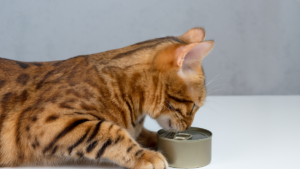
Cats are some of the most fascinating—and sometimes demanding—pets you can have. They can be adorable, cuddly, playful, and even a little spoiled. If you have a cat, you know exactly what we mean. It’s nearly impossible to resist their sweet eyes and cute meows, especially when they beg for a treat. Cats love treats, and they enjoy all kinds of them. So, if you want to make your feline friend truly happy, it helps to know about the best DIY cat treat recipes.
Homemade cat treats are a great way to spoil your cat while also being mindful of what they eat. You can control the ingredients and ensure your cat gets only healthy, nutritious snacks. Plus, it’s fun and rewarding to make your own cat treats at home.
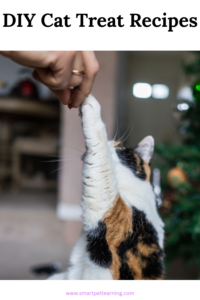
DIY Cat Treat Recipes: All Cats Are Not the Same
Before we dive into the recipes, let’s talk about why making your own cat treats can be better than simply buying them at the store. After all, it seems easier, right? Not always. Here are some benefits of DIY cat treat recipes:
Control Over Ingredients
Commercial cat treats often contain preservatives, artificial flavors, colors, and fillers. Some of these ingredients may not be good for your cat—or could even be toxic. By making your own treats, you can choose the safest, highest-quality ingredients for your cat.
Customize to Your Cat’s Preferences
Every cat has unique tastes. Some love meaty treats, some prefer crunchy textures, and others enjoy soft, chewy snacks. Making your own treats allows you to customize the flavor, texture, and shape to suit your cat’s individual preferences.
Bonding Time
Preparing treats is a fun and rewarding experience. It’s also a way to bond with your cat while providing them with the delicious snacks they love.
Cost-Effective
Store-bought cat treats can add up, especially if you have more than one cat. Homemade treats are often more affordable, and you can control portion sizes to make them last longer.

Safety Tips for Making Homemade Cat Treats
Before you start baking, keep these safety tips in mind:
Avoid Toxic Ingredients
Never use ingredients that are toxic to cats, such as onions, garlic, chocolate, grapes, raisins, alcohol, or artificial sweeteners like xylitol.
Use Moderate Portions
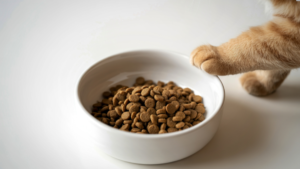
Cat treats should make up no more than 10% of your cat’s daily caloric intake. Too many treats can lead to obesity and other health problems.
Choose Safe and Appealing Flavors
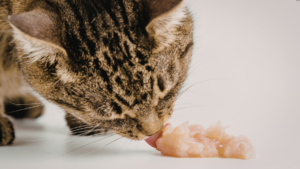
Cats are naturally drawn to savory, protein-rich foods. Fish, chicken, turkey, and some cheeses are usually safe and appealing.
Consider Texture
Cats have sensitive digestive systems, so avoid spices or ingredients that are hard to digest. Treats should be easy to chew or bite-sized.
Ingredients for Homemade Cat Treats
Now that you know the basics, let’s look at the most common ingredients used to make delicious and healthy cat treats. Remember, treats are just that—they should supplement your cat’s regular diet, not replace it.
Protein
Protein is an essential part of a cat’s diet and is the main ingredient in most cat treats. Use cooked chicken, turkey, tuna, salmon, or other canned fish in water. Make sure all meat is boneless, skinless, and thoroughly cooked.
Grains
Whole grains like oats or whole wheat flour can be used to make the treat dough. They provide fiber and help bind ingredients together. Use in moderation, as some cats may be sensitive to grains.
Cat-Safe Vegetables
Pureed pumpkin, carrots, or peas can be added for extra fiber and nutrition. These vegetables are safe for cats and can support healthy digestion.
Eggs
Eggs are a great source of protein and help bind ingredients together. You can use a whole egg or just the egg whites.
Cheese
A small amount of cheddar or cottage cheese adds flavor and richness.
Catnip
Catnip is optional but loved by most cats. Sprinkle dried catnip on the treats or mix it into the dough.
Easy DIY Cat Treat Recipes
Ready to start baking? Here are some of the best and easiest DIY cat treat recipes:
1. Tuna Bites
Ingredients:
-
1 can tuna in water, drained
-
1 cup oat flour
-
1 egg
Instructions:
-
Preheat oven to 350°F (175°C).
-
Mix all ingredients in a bowl until a dough forms.
-
Roll the dough into small balls and place on a parchment-lined baking sheet.
-
Bake for 10–12 minutes, until golden and firm.
-
Let cool completely before serving.
2. Chicken and Cheese Crunchies
Ingredients:
-
1/2 cup cooked chicken, finely chopped
-
1/4 cup shredded cheddar cheese
-
1/2 cup whole wheat flour
-
1 egg
Instructions:
-
Preheat oven to 350°F (175°C).
-
Mix all ingredients in a bowl until combined.
-
Roll out dough and cut into small bite-sized shapes using a cookie cutter.
-
Bake for 12–15 minutes.
-
Cool completely before giving to your cat.
The combination of chicken and cheese creates a crunchy, flavorful treat most cats find irresistible.
3. Salmon Soft Bites
Ingredients:
-
1 can salmon, drained
-
1/2 cup oat flour
-
1 egg
-
1 tablespoon dried catnip (optional)
Instructions:
-
Preheat oven to 325°F (160°C).
-
Mix all ingredients until a soft dough forms.
-
Shape into small squares or balls and place on a lined baking sheet.
-
Bake for 15–20 minutes, until firm but soft enough to chew.
-
Cool completely before serving.
Soft bites are ideal for kittens or senior cats who may struggle with harder treats.
4. Pumpkin and Chicken Delight
Ingredients:
-
1/2 cup cooked chicken, finely chopped
-
1/4 cup pure pumpkin puree
-
1/2 cup oat flour
-
1 egg
Instructions:
-
Preheat oven to 350°F (175°C).
-
Mix all ingredients until a dough forms.
-
Roll out and cut into small pieces or shape into balls.
-
Bake for 12–15 minutes.
-
Let cool before serving.
Pumpkin is excellent for digestion, making these treats both tasty and healthy for cats with sensitive stomachs.
5. Catnip Cheddar Cookies
Ingredients:
-
1/2 cup whole wheat flour
-
1/4 cup shredded cheddar cheese
-
1 egg
-
1 teaspoon dried catnip
Instructions:
-
Preheat oven to 350°F (175°C).
-
Combine all ingredients to form a dough.
-
Roll out and cut into small shapes.
-
Bake for 10–12 minutes, until golden brown.
-
Cool completely before serving.
The catnip makes these cookies especially enticing, and the cheese adds a savory kick.
Storage and Serving Tips
-
Storage: Store homemade treats in an airtight container in the refrigerator for up to a week or freeze for up to three months.
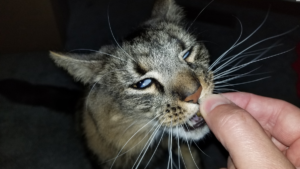
-
Serving: Offer treats in moderation and observe your cat’s reaction. Some cats prefer soft treats, while others enjoy crunchy ones.
-
Introduce Gradually: If your cat isn’t used to homemade treats, introduce them slowly to avoid digestive upset.
Extra Tips for Successful DIY Cat Treats
-
Experiment with Flavors: Cats have unique tastes. Try different proteins and textures to find their favorite.
-
Use Cookie Cutters: Fun shapes make treat time more enjoyable for you and visually appealing if you share photos.
-
Avoid Salt: Cats don’t need extra salt, and too much can be harmful.
-
Add Some Veggies: Small amounts of pumpkin, carrots, or peas add fiber without overwhelming the flavor.
-
Keep Portions Small: Cats have tiny stomachs, so bite-sized treats are ideal.
The Benefits of Homemade Treats
Making your own cat treats is fun, healthy, and rewarding. Homemade treats allow you to control ingredients, customize flavors and textures, and strengthen your bond with your cat. They can also save money and reduce waste compared to store-bought options.
Conclusion
Homemade treats are a wonderful way to show love and care for your cat. They can be delicious, healthy, and made with simple ingredients you likely already have at home. With a little time and effort, you can make DIY cat treat recipes that your cat will love and that will brighten their day. Remember to offer treats in moderation, focus on protein-rich ingredients, and always prioritize your cat’s safety. Happy baking!
Save pin for later

- The Cutest Cat Breeds in the World - March 21, 2026
- Black Cat Names That Are as Mysterious and Beautiful as They Are - March 21, 2026
- Did You Know Your Dog Could Have Diabetes? - March 20, 2026