Cats scratch. There’s no denying it. If you’ve ever come home to a shredded couch, a carpet with frayed threads, or found your kitty dexterously peeling back the wallpaper with her claws, you’ve experienced feline scratching firsthand. One of the best ways to save your furniture and make your cat happy is with DIY cat scratching posts.
These posts give your kitty a dedicated, safe place to stretch, scratch, and maintain their claws, and making one at home means you can customize it to match both your home and your cat’s preferences.
Here, we’ll cover tips, ideas, and step-by-step instructions for creating your own cat scratching post. From materials and design to decoration and practical DIY projects for any skill level, you’ll find inspiration for fun, functional, and feline-friendly creations.
Why Cats Need Scratching Posts
Scratching is instinctual for cats, and it serves several important purposes:
-
Claw Maintenance: Scratching removes the outer layer of a cat’s claws, keeping them sharp and healthy.
-
Stretching and Exercise: Scratching stretches and flexes muscles, particularly in the shoulders, back, and paws.
-
Territorial Marking: Cats have scent glands in their paws, and scratching marks their territory visually and with scent.
-
Stress Relief: Scratching is a natural way for cats to relieve stress and expend pent-up energy.
Without a proper outlet, cats may turn to your furniture, carpets, or drapes. A good scratching post protects your home while keeping your kitty happy and engaged.
Types of DIY Cat Scratching Posts
Scratching posts come in various shapes and sizes, and cats have individual preferences for height, texture, and orientation. Here are some common types you can make at home:
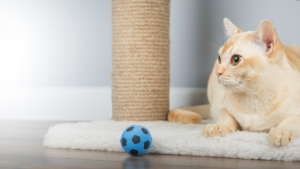
1. Vertical Scratching Posts
The classic upright scratching post allows cats to stretch fully while scratching. It should be about 2–3 feet tall and covered in a material your cat likes, such as sisal rope, carpet, or burlap.
DIY Tip: Wrap a wooden dowel or PVC pipe with sisal rope, securing it with non-toxic glue or staples, and attach a wide, stable base to prevent tipping.
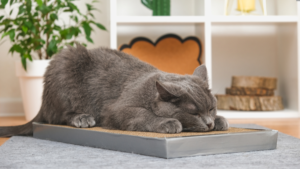
2. Horizontal Scratching Boards
Some cats prefer horizontal scratching, similar to how they scratch on floors or low furniture. Horizontal boards are ideal for cats that like to scratch while lying down or stretching out.
DIY Tip: Use a piece of sturdy cardboard, wood, or MDF board. Cover it in sisal or carpet and add a slight incline for added engagement.
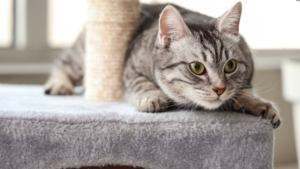
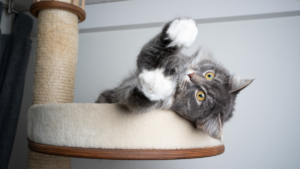
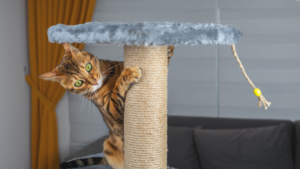
3. Multi-Level Scratching Towers
Multi-level scratching towers are perfect for multi-cat homes or cats who love to climb. They combine vertical posts, horizontal boards, and platforms for lounging or playing.
DIY Tip: Stack vertical posts with horizontal platforms at different heights, cover each section with sisal or carpet, and add dangling toys for extra fun.
Materials You’ll Need for a DIY Cat Scratching Post
Before starting, gather these commonly used materials:
-
Base: Wood board or thick plywood for stability
-
Post: Wooden dowel, PVC pipe, or cardboard tube
-
Covering: Sisal rope, carpet scraps, burlap, or jute
-
Adhesive: Non-toxic glue or a pet-safe hot glue gun
-
Fasteners: Screws, nails, or staples
-
Optional: Small bells, dangling toys, feather attachments
Always prioritize safety. Use pet-safe materials, avoid sharp edges or splinters, and ensure the post is sturdy enough to support your cat’s weight during play.
Step-by-Step Guide to Making a Simple Vertical Scratching Post
Here’s a simple project you can complete in under an hour:
Materials Needed:
-
Wooden dowel (3 feet tall, 2–3 inches in diameter)
-
Plywood base (12” x 12”)
-
Sisal rope
-
Non-toxic glue
-
Screws and screwdriver
Instructions:
-
Prepare the Base: Drill a hole in the center of the plywood slightly smaller than the dowel’s diameter.
-
Attach the Post: Insert the dowel and secure it with screws from underneath. Ensure it’s stable and doesn’t wobble.
-
Wrap the Post: Start at the bottom, apply a small amount of glue, and wrap the sisal rope tightly around the post, gluing every few inches.
-
Finish the Top: Cut the rope, glue the end at the top, and ensure there are no loose strands your cat could swallow.
-
Optional Extras: Add a dangling toy or small platform for extra engagement.
Creative DIY Cat Scratching Post Ideas
Here are some ideas to make your DIY post fun and unique:
1. Rustic Log Cat Scratcher
Use a natural tree log as your post. Strip the bark, sand it smooth, and wrap the scratching area with sisal for a natural look and texture.
2. Upcycled Furniture Cat Scratcher
Repurpose an old chair or side table by covering its legs with sisal rope. Your cat gets a scratch-friendly surface, and you recycle furniture creatively.
3. Wall-Mounted Cat Scratching Board
For small spaces, mount a scratching board or post on the wall using sturdy brackets and cover it with carpet or sisal. Cats love vertical climbing, and this saves floor space.
4. DIY Cat Tree with Multiple Scratching Posts
Combine several DIY posts with shelves, beds, or hammocks to make a multifunctional cat tree. Add dangling toys for extra play.
Encouraging Your Cat to Use Their New Scratching Post
Building the post is just part of the process. To encourage use:
-
Sprinkle Catnip: A little catnip makes the post irresistible.
-
Use Toys: Dangling toys or balls near the post can entice scratching.
-
Place Strategically: Put the post near favorite lounging or sleeping spots.
-
Praise and Reward: Treats or gentle praise after use reinforce good behavior.
-
Discourage Other Scratching: Cover surfaces you want protected with double-sided tape or pet-safe deterrents.
Maintaining Your DIY Cat Scratching Post
Even the sturdiest post needs upkeep:
-
Inspect for Wear: Replace or re-wrap frayed sisal.
-
Clean Surfaces: Vacuum or wipe away fur and dust.
-
Check Stability: Tighten screws and ensure the base is secure.
-
Rotate Toys: Swap old dangling toys for fresh ones to keep interest high.
DIY vs. Store-Bought Scratching Posts
Making your own post has many benefits:
-
Customization: Choose size, style, and materials that suit your home and cat.
-
Cost Savings: DIY is often cheaper, using household or inexpensive materials.
-
Sustainability: Upcycle old furniture or scrap wood.
-
Bonding: Enjoy the process, and your cat may “inspect” your work.
-
Creative Control: Add features, toys, or platforms tailored to your cat’s personality.
Troubleshooting Common DIY Cat Scratching Post Issues
Even the best posts can have challenges:
-
Post Ignored: Try relocating it or sprinkling catnip.
-
Scratching Too Aggressive: Make sure the post is tall and sturdy enough for stretching.
-
Post Tipping: Add a larger or heavier base or anchor it to a wall.
-
Furniture Scratching: Use deterrents while keeping the DIY post attractive.
Conclusion
A well-made DIY cat scratching post is more than just a scratching surface—it’s enrichment, exercise, and mental stimulation for your cat. From simple vertical posts to elaborate towers, there’s a project for every skill level, budget, and home. Using the tips, materials, and creative ideas shared here, you can make a safe, fun, and appealing scratching post that keeps your feline happy and protects your furniture.
Save pin for later

- The Cutest Cat Breeds in the World - March 21, 2026
- Black Cat Names That Are as Mysterious and Beautiful as They Are - March 21, 2026
- Did You Know Your Dog Could Have Diabetes? - March 20, 2026